
Create a GitLab Repository
Last updated on 2026-07-27 | Edit this page
Estimated time: 10 minutes
Overview
Questions
- How do I create a new repository on GitLab?
- How do I clone the repository to my local computer?
Objectives
- Create
multiverserepository on GitLab - Clone the
multiverserepository using VS Code
When the workshop begins, you should be sharing your screen, and instruct the learners to make sure their setup looks like yours:
- A new VS Code window is open (taking up the left 75% of the screen)
- A browser window with https://code.ornl.gov is open (taking up the right 75% of the screen)
In your browser window, you can have a second tab open with all images for this workshop, available at this URL
Create a new repo on GitLab
The first thing we need to do is create a new repository. While you can create repositories locally, and never even connect the local repo to a remote repo (hosted on a site like GitLab), the simplist and most common pattern to first create a new repo on GitLab, and then clone that repo to your local computer.
You should already be signed in to GitLab. You can create a new repo from anywhere on the site by clicking on the “+” icon in the upper right, and then clicking “New project/repository”:
Select “Create a blank project”
Type multiverse for the project name.
Under “Project URL”, select your username as the owner.
Leave all other options as the default - your repo should be private and initialized with a README.
Finally, click the blue “Create project” button at the bottom.
You will be redirected to your newly created and empty
multiverse repo.
Clone your multiverse repo to your local computer
Now that the multiverse repo has been created, we can
“clone” it (get a local copy of the repo) through VS Code.
Make sure you have a new VS Code window open. If you already have a repo/folder open in VS Code, go to the “File” menu and click “New window”.
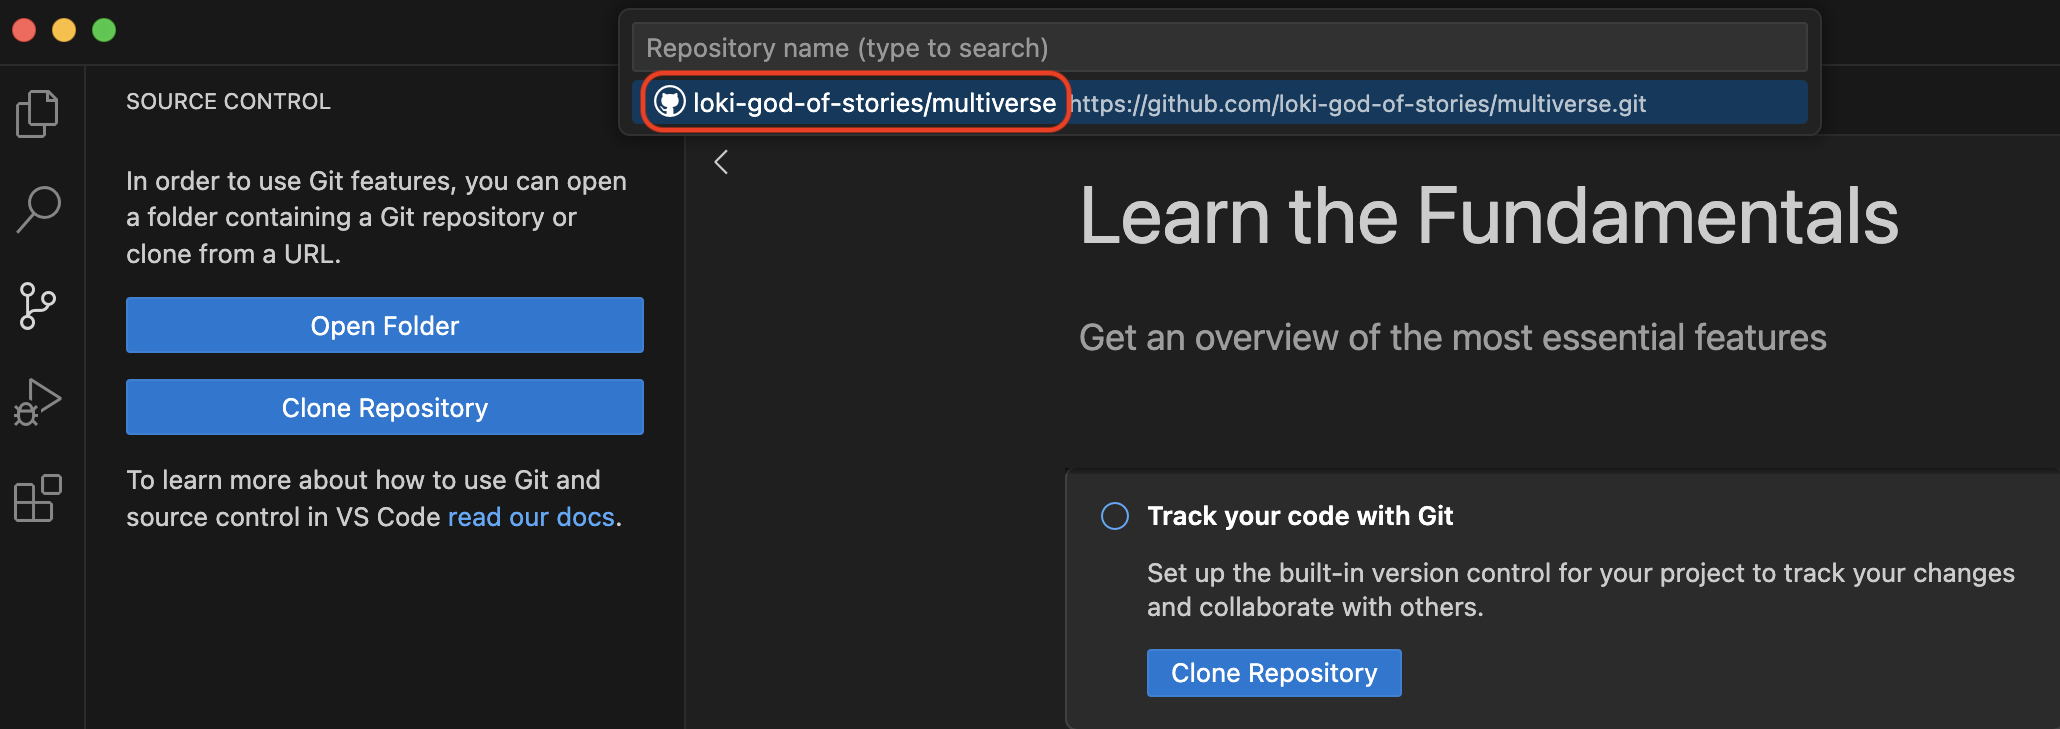
In your new VS Code window, go to the “Source Control” pane (the 3rd one down). Click “Clone Repository”, and then click “Clone from GitLab”.
If you don’t immediately see your multiverse repo, you
can search for it by typing “multiverse” in the search box. When you see
your multiverse repo (it should have your username in the
URL), click it.
You will now need to choose where on your local computer the
multiverse repo will live. You can choose any easily
accessible location, such as the “Desktop” folder. It is standard
practice to save all local repos in a folder named “GitLab” in your
“Documents” folder.
Click “Open” when prompted to open the newly cloned
multiverse repo.
Open a Bash Terminal in VS Code
Now that you have your multiverse repo cloned and open
in VS Code, the last step is to open a bash terminal.
To see the terminal pane, go to the “Terminal” menu, and click “New terminal”.
If you are on a Windows computer, you will need to specifically open a GitBash terminal. Find the “+” icon in the terminal pane, and click the carrot dropdown icon next to it. Click “GitBash”.
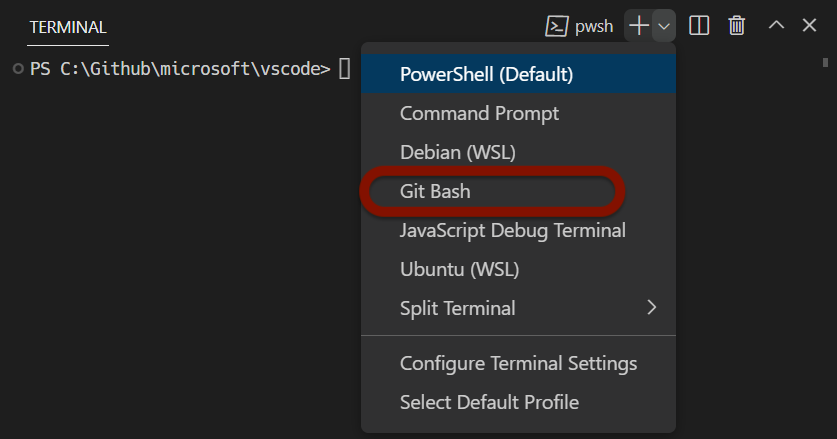
If you are on a Mac or Linux computer, your default terminal should be sufficient. You can also choose to open a Bash terminal by following the same instructions.
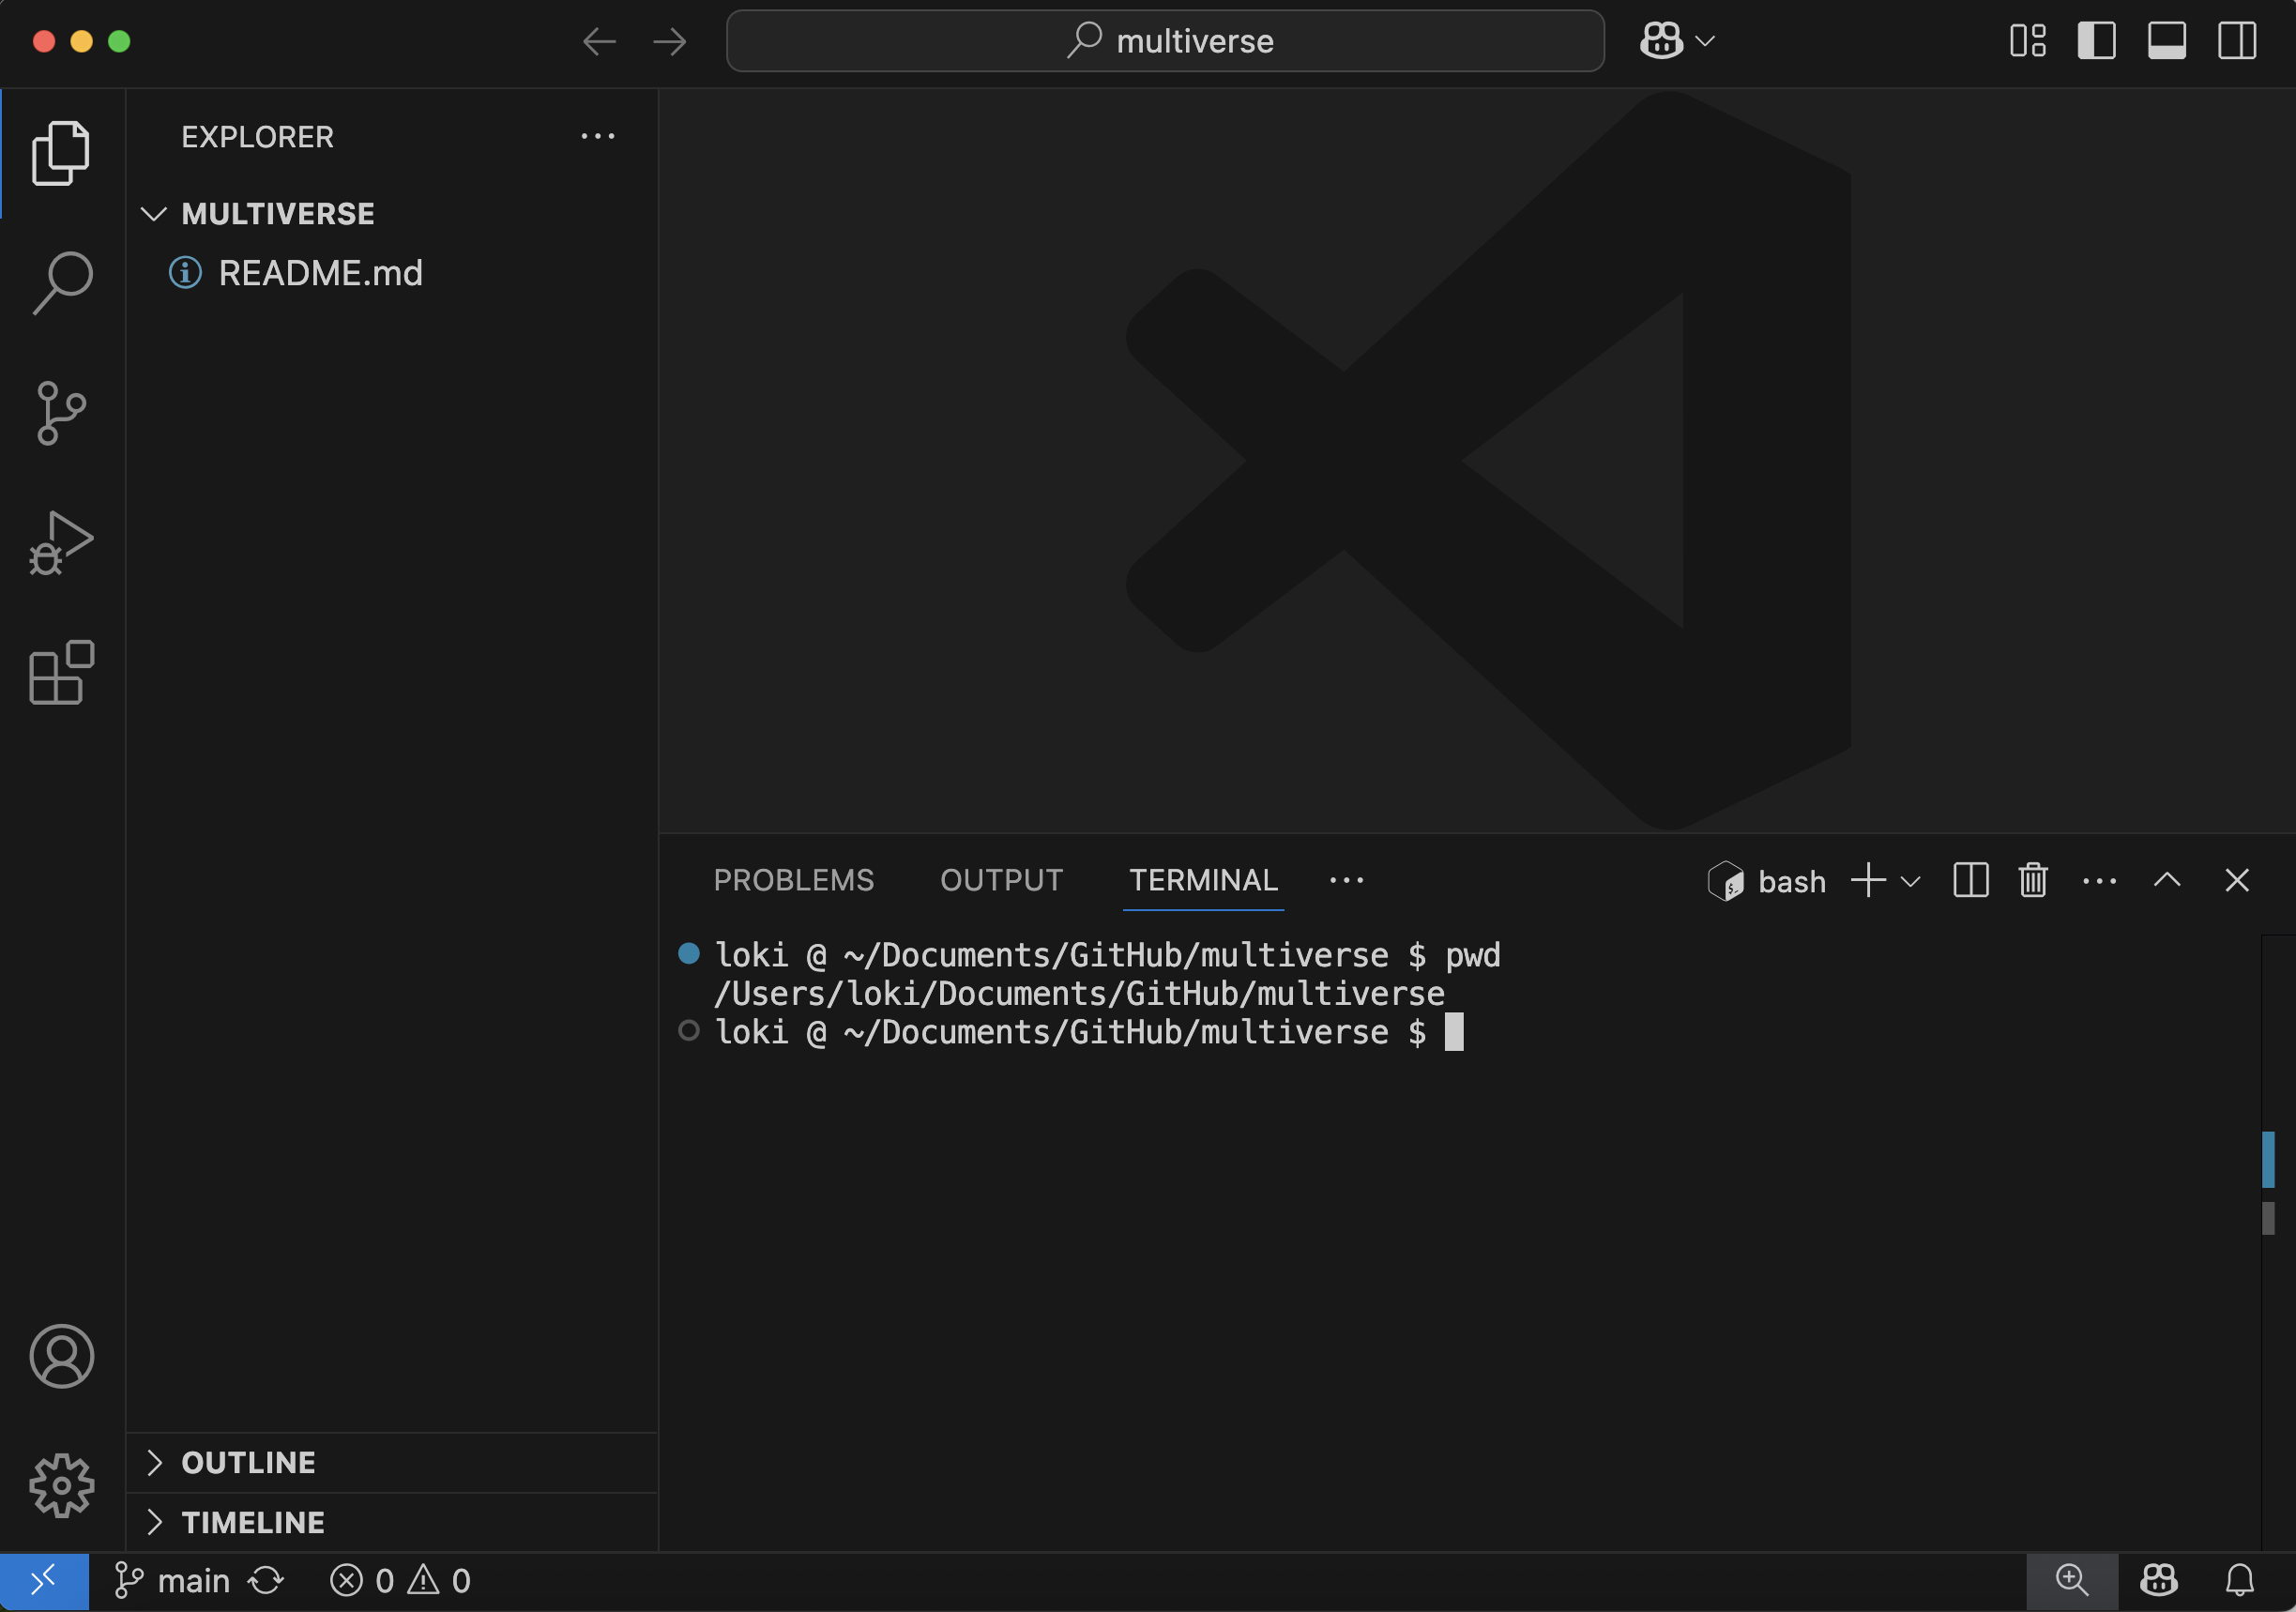
You should now have your empty multiverse repo open,
with a Bash terminal open, and you are ready to start typing your first
git commands!
- Create a new repository on GitLab
- Clone the repository to your local computer
- Open the terminal in VS Code