Overview
Teaching: 60 min
Exercises: 0 minQuestions
How can I used PyDev to develop Python applications
What are the main features of PyDev that will help me develop Python programs
Objectives
Learn how to configure PyDev.
Learn how to create Python packages and modules.
Understand the basic features of Eclipse.
Be familiar with terminology.
Experiment with the software engineering features of Eclipse and PyDev.
PyDev is an Eclipse-based development environment for Python programs. It provides a commercial-quality environment for working on any size Python development projects. The main features provided by PyDev include:
- Syntax highlighting
- Code formatting
- Code completion
- Code analysis
- Type hinting
- Refactoring
- Visual debugging
- Unittest integration
- Code coverage
In addition, because PyDev is built using Eclipse, it also has available many of the development tools that are integrated with the Eclipse environment, such as C/C++, Git, and modeling tools.
Configuring PyDev
After starting Eclipse and selecting a workspace where your files will be kept (the default one is fine), you are now almost ready to create your first project. Before doing this, however, we have to set up PyDev so that it knows about your Python installation. This is particularly important if you’ve installed a new version, such as Anaconda, in a non-standard location.
To start, we’re going to first switch to the PyDev perspective, which is an arrangement of views and windows that are designed to assist Python development. To do this, go to the Quick Access box in the top right corner, and type “pydev”. Choose the PyDev perspective from the list.
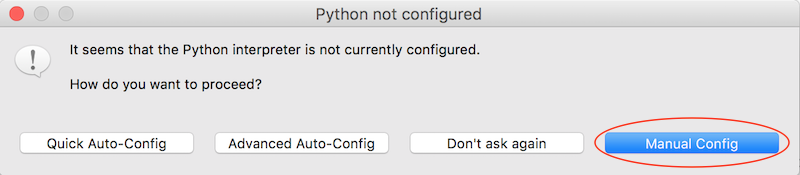
If this is the first time you’ve used PyDev, then you may see a dialog pop up like the one below. Don’t panic! This is just PyDev telling you that it needs to configure the Python environment. If you’re using Anaconda, then you’ll need to select the Manual Config button.
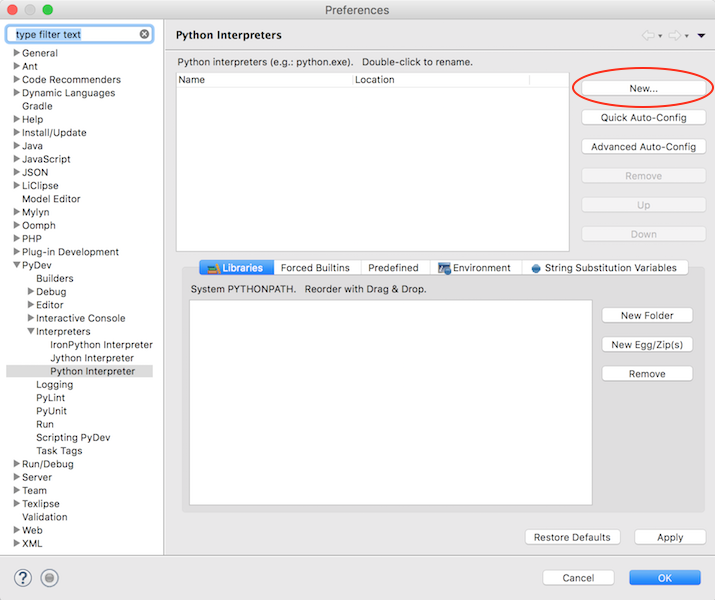
This will open the PyDev Python interpreter preference page as shown below. Now click on the New button.
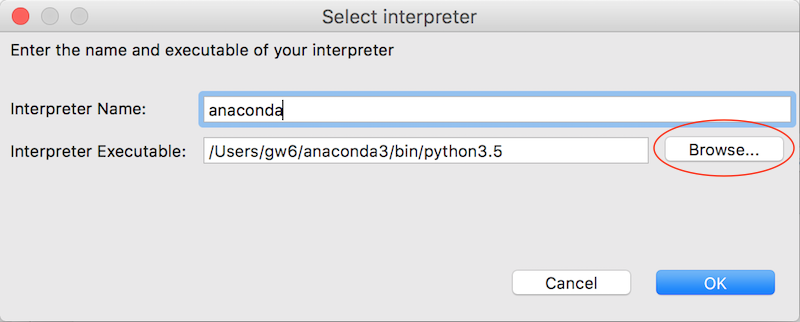
You should now see another dialog asking you to select the interpreter. Enter a name
(anything can be used here, e.g. “anaconda”), then click the Browse… button. Navigate
to the installation location for Anaconda (usually called anaconda3 in your
home directory), then select the python program in the bin directory. The image below
shows the dialog after the python progam was selected. PyDev worked out that this was
Python 3.5 and changed the path to correspond to this version.
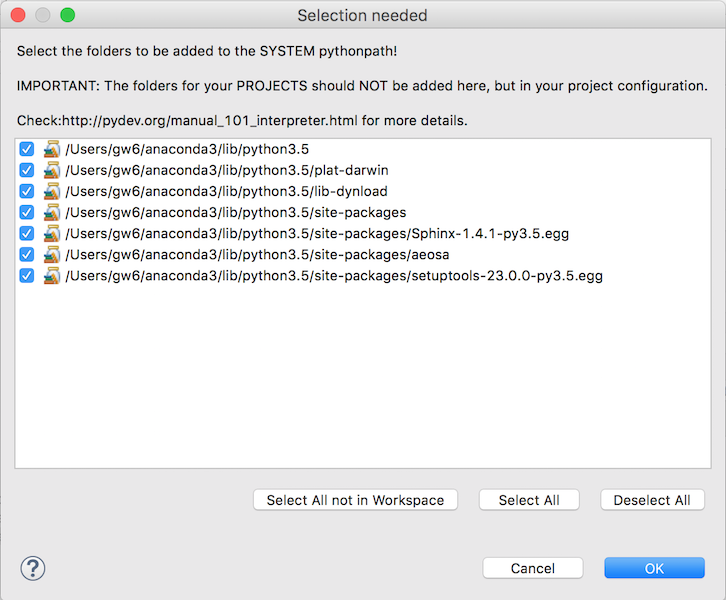
Once you’ve done this, click the OK button. If you chose the right program, you should now see a dialog asking if you would like a list of folders to be added to the SYSTEM pythonpath. Just click OK here.
Finally, you should click on OK to save the preference changes.
Your First Project
Now you are ready to create your first PyDev project. Here is a screenshot of the main window after switching to the PyDev perspective. This is for Mac OS X, but it should look similar on Windows and Linux.
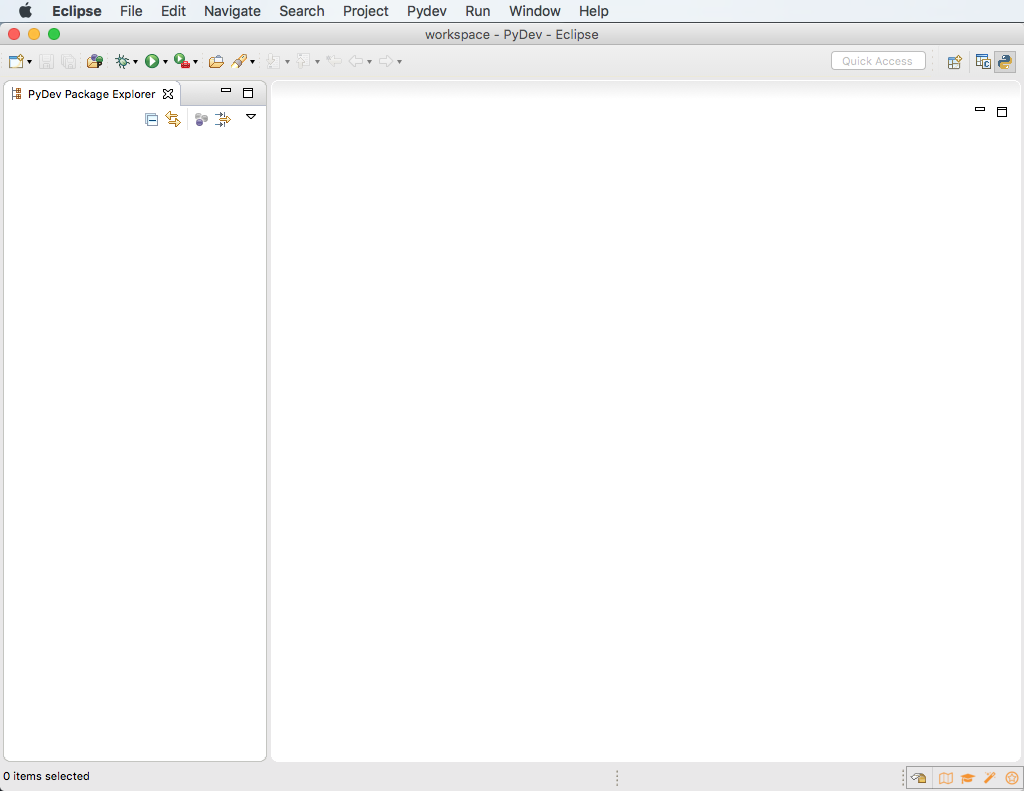
You can ignore most of the icons and menus for now. The first thing to notice is that it is divided into two parts. On the left is the PyDev Package Explorer. This is where your projects, packages, and modules will be visible. On the right is a big empty area that we will be using to edit Python code soon.
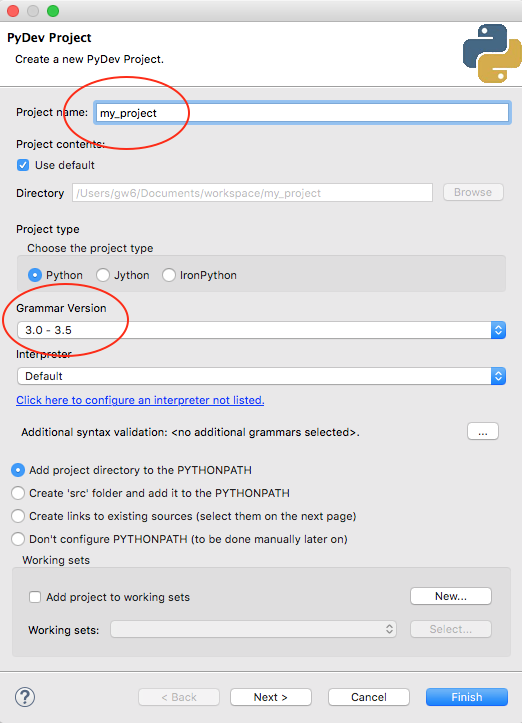
To create a new project, select File > New > PyDev Project to open the new project wizard. There are many settings that you can change on this dialog, but for now, just give your project a name (e.g. “my_project”). You also probably want to set the Grammar Version setting to 3.0 - 3.5 since we’ll be using Python 3.5 in this tutorial.
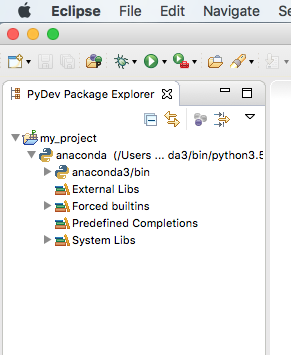
When you’re done, select the Finish button and you should see the project appear in the Package Explorer view. Clicking on the small triangle to the left of the project will open it. Notice there are no source files yet, however you will see a reference to the “anaconda” interpreter we configured earlier. Opening this will show configuration information used by the interpreter.
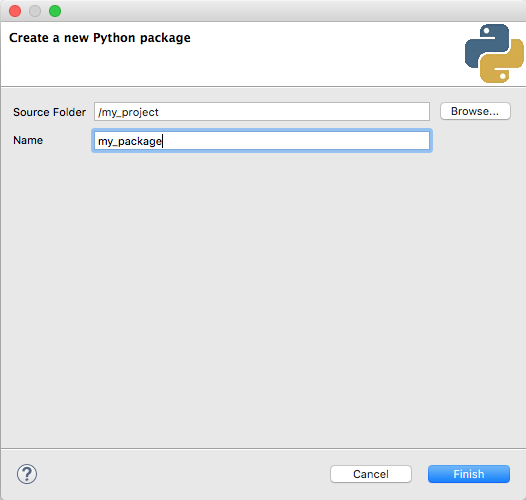
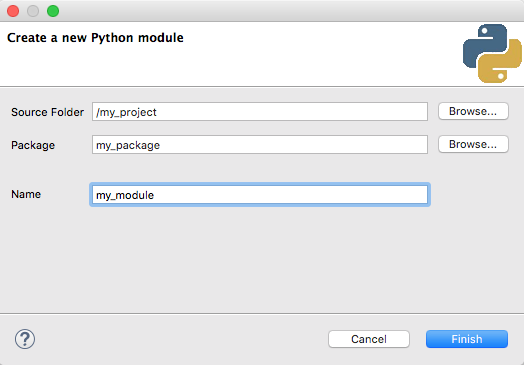
Before creating a Python source file (called a module in Python terminology), you first must create one or more packages. The modules you create will then reside in these packages. To create a package, make sure you have the project selected in the Packager Explorer view, then select File > New > PyDev Package. If the Source Folder field is empty, then you didn’t have the project selected (in which case, you can just manually enter “/my_project”). Now enter a package name (e.g. “my_package”) into the Name field and select Finish.
You will now see the new package has been created in the Package Explorer. It is also automatically created
an __init__.py module for the package (see Packages
for more details.) Packages can also be nested within other packages. You can do this by selecting the destination package first in the
Package Explorer, then use File > New > PyDev Package to create the package.
Python packages
Packages provide an important way of structuring Python’s module (file) namespace, and are how virtually all Python libraries are distributed. It is good practice to always structure your Python code using packages. That way, even small programs can be easily distributed and reused.
Modules must be created within a package, so select a package in the Package Explorer from the ones you have created,
the use File > New > PyDev Module. Give the module a name (without the trailing .py) and click on Finish.
PyDev will now give you the opportunity to select from a predefined set of module templates. These templates provide an easy way to create a module based on boilerplate code. You can also add your own templates if you desire.
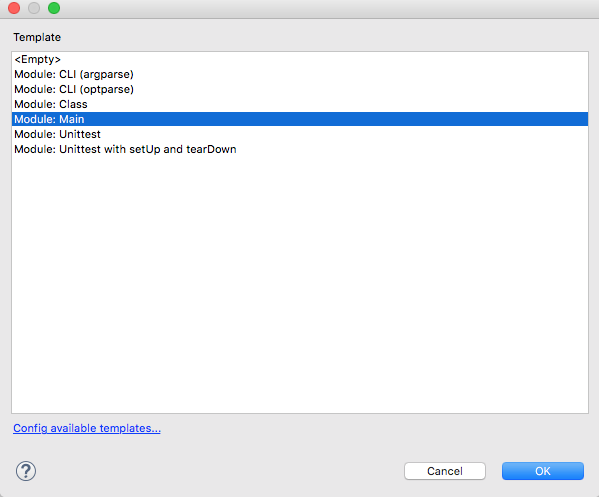
You can either select one of the templates from the list, or just hit OK and a new editor window will open on the module.
Editor Features
If you used the Module: Main template, which adds a Python main program to the file, you will see something like
the image below. You can also see that the pass statement has been highlighted and this is where the cursor is
located. When you begin typing, it will replace the pass statement with your code.
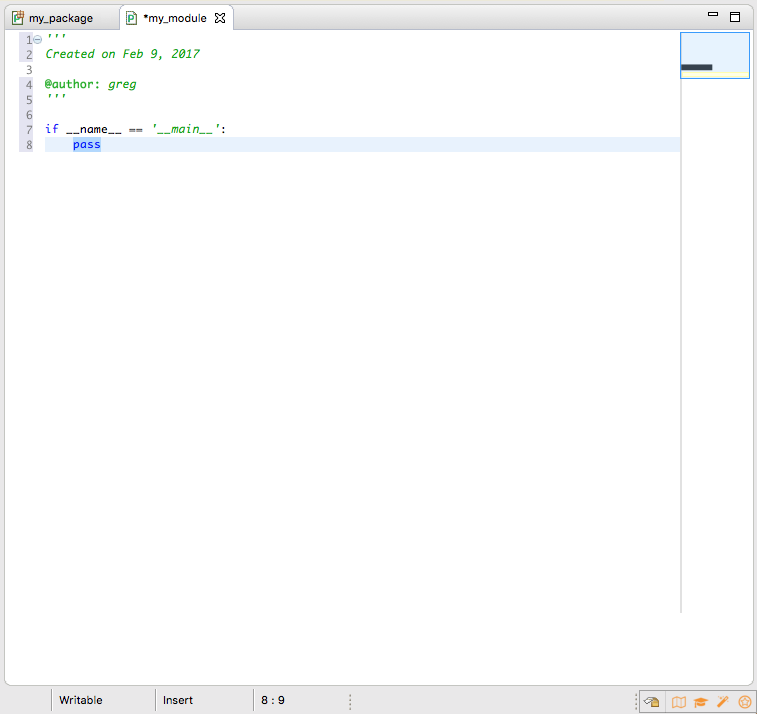
Notice there is syntax highlighting (color coding of keywords and strings), and also the there is an asterisk (*) next to
the name of the module in the editor tab. This indicates that the file has been modified and needs to be saved. On the
right hand edge of the editor, there is a outline view of the code. The blue box represents the total extent of the code.
Python statments, syntax errors, and the current insertion point are all shown pictorially in the outline view. At the bottom
of the editor are three status fields. The first shows permissions for the file being edited (Writable, Read Only, etc.).
The second shows the edit mode (Insert or Overwrite) which can be changed by double clicking on the field. The last field
shows the line and character position of the insertion point.
See the PyDev Manual for complete details on how to use the editor.
Running My Program
Let’s now add some code to make our program do something. With the pass statement selected, replace it with
“print(fib(10))”. You’ll notice that the word “fib” is underlined in red and there is a white X in the margin. If you hover over either
of these, you will see a tooltip popup that says Undefined variable: fib. This is because we haven’t defined the
fib function yet. This is in contrast to normal Python development, where undefined functions or variables are only
discovered during execution of the probram.
Next, move the cursor to the line before the if statement and enter “def fib(n):”. As you type, you will see PyDev making suggestions
about what could be entered, and when you enter the first “(“, PyDev will add “):” automatically. This is know as
code completion, and reduces the amount of typing you need to do significantly. After you type the parameter “n” you have
two choices. You can place the cursor after the “:” and hit Enter to start a new line, or you can just type
Shift + Enter and PyDev will move to the next line automatically. Now type the rest of the function body:
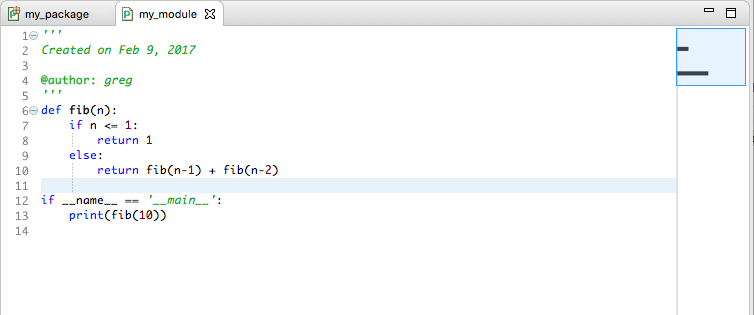
 def fib(n):
     if n <= 1:
         return 1
     else:
         return fib(n-1) + fib(n-2)
Once you’ve entered this code, all the error markers should disappear. Save the file. At this point you should see something like the image below. Now we are ready to run the program.
Running the program is easy. Just make sure that the module is selected in the Package Explorer view, and choose Run > Run. Your program should immediately run, and the results will be displayed in a Console view which popped up below the editor window.
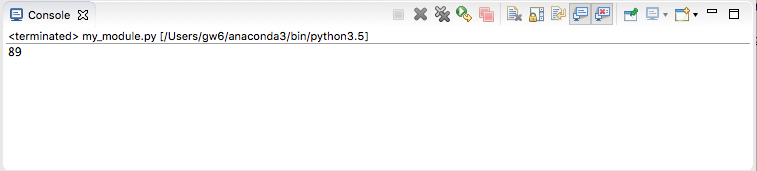
But wait a minute! We know that the 10th element in the Fibonacci sequence is 55, not 89. What is going on here?
Fixing Bugs
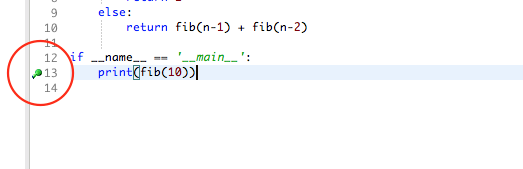
Let’s run the same Python program, but this time under the control of a debugger. First, let’s tell the debugger that
we want to suspend execution when the print(fib(10)) statement is about to be executed. To do this, we need to set a
breakpoint at line 13. Just point to the number 13 in the left hand margin and double click. You should now see a
breakpoint marker on the line.
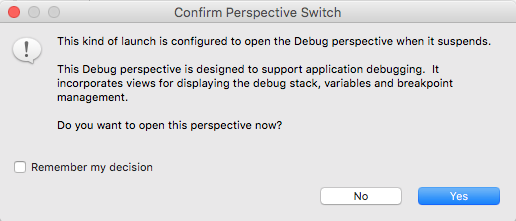
Now, to start the debugger just choose Run > Debug. The first time you do this, you will see the dialog below. This is just to warn you that the perspective is going to switch to the Debug perspective. If you want this to happen automatically in the future (and I would recommend doing so), check the box next to Remember my decision and click on Yes.
Whoa, everything just changed! Don’t worry, this was supposed to happen. You are now in a Python debugger, and rather than having to launch a separate tool, PyDev has done it all for you. Here’s what you should see:
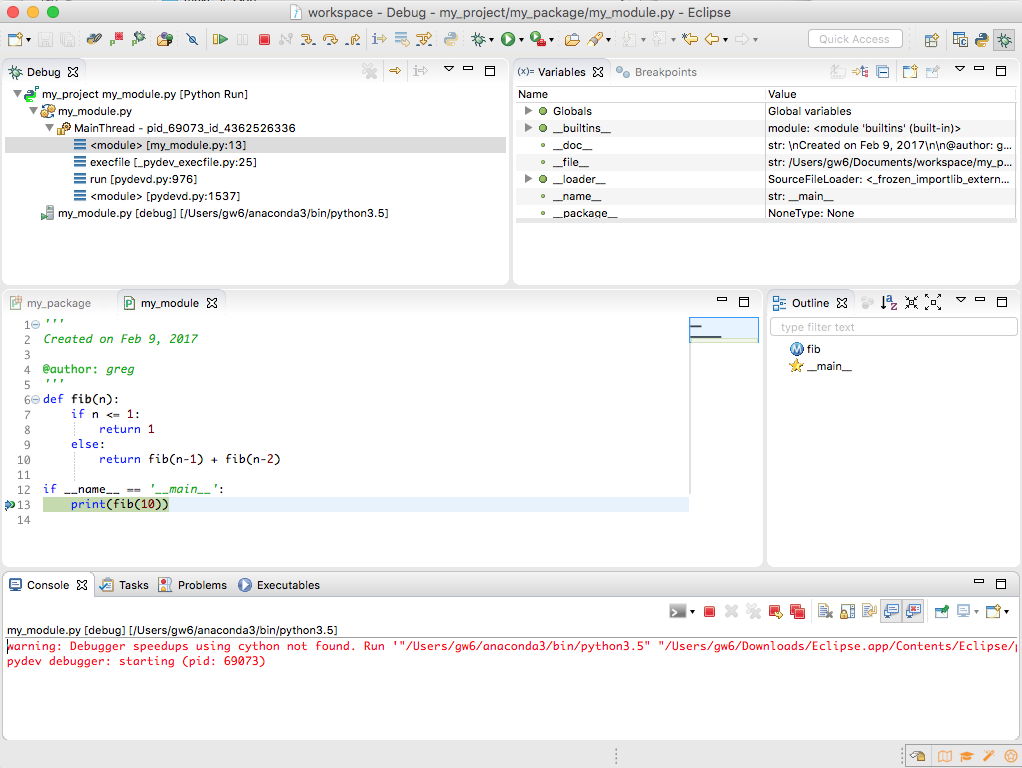
This looks a little complicated, but it is all layed out pretty logically:
- Across the top is a toolbar with a variety of debug commands. Well use some of these in a minute.
- Below that is the Debug view (top left) which shows the current call stack. You can see that the line
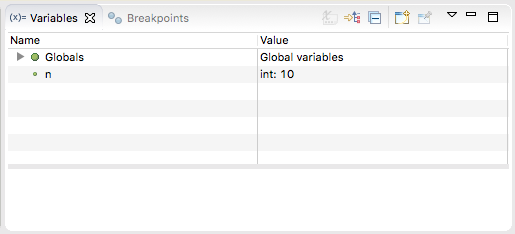
<module> [my_module.py:13]is highlighted, which tells you that the program is currently suspended at line 13 of my_module.py (where we put the breakpoint.) This view is important for navigating up and down the call stack. - To the right is the Variables view (top right) which shows all the local and global variables in the program.
- Behind the Variabls view, but not visible, is the Breakpoints view, which lists all the breakpoints you’ve set.
- Below the Debug view is the normal editor you’re used to using. The editor has a marker in it showing the line at which the program is suspended, and this line is also highlighted.
- To the right of the editor is the Outline view, which shows a high level outline of the program.
- Finally, at the bottom is the Console view that we’ve seen before (there are also some other views we’re not going to discuss here.
Now, in order to work out the bug, we’re going to tell the program to execute statements one at a time so we can see what is going on. We do this by single stepping the program. There are three buttons on the toolbar that we can use to do this:
 Step Into - Single step the program, but when a function
call is encountered, step into the function.
Step Into - Single step the program, but when a function
call is encountered, step into the function. Step Over - Single step the program, but when a function
call is encountered, step over the function (i.e. execute the function as if it was a builtin function).
Step Over - Single step the program, but when a function
call is encountered, step over the function (i.e. execute the function as if it was a builtin function). Step Return - Single step the program, but return
immediately to where the current function was called from. If the current function is the main program, exit the program.
Step Return - Single step the program, but return
immediately to where the current function was called from. If the current function is the main program, exit the program.
So, lets begin by clicking on the Step Into button. When you do this,
you’ll notice that the fib function appears in the call stack, and we see the current line in the editor move to the first
line of the function. Also, notice that the variables view has changed, and now shows the value of the argument n that
was passed into the function.
If we click on again, we can see which branch of the if
statement was taken (the second, since n is currently 10.) Keep clicking on
and you will see more and more entries for fib in the call stack. This is because the fib function is recursive,
i.e. it calls itself. We are interested in when fib is called with the value 2. Notice that when this happens, the
fib function still takes the second branch of the if statement.
AHA!
We know that the second element of the Fibonacci sequence is 1, so fib(2) should return the value 1. Instead, it will
return the value of fib(1) + fib(0) which will evaluate to 2 in our function. Our if statement
should actually be if n <= 2:.
Now that we’ve finished debugging, we can click on the  Terminate button to end the debug session.
Where To Go From Here?
- The PyDev homepage
- The PyDev user manual
- A blog that has information on PyDev development
- PyDev bug tracker
- PyDev feature requests
- Source code
- If you have questions, StackOverflow (with the PyDev tag)
Key Points
PyDev provides a complete integrated environment for Python development
Integration with other tools, such as Git version control, are also available
PyDev is useful for small, medium or large collaborative projects
PyDev automates many aspects of Python development